
|
|
Signal Reports by WebSDR |
|
WebSDR is an increasingly popular way to use your
computer to supplement your rig's receiver. Net
Controllers may use it to hear the net controller
preceding them on the schedule to know when he has
passed the net. Its a very convenient way to
cruise the bands, SWL-wise, and do so with the
portability of your iPad, laptop, cellphone, or even
your desktop. For purposes of this article, it
also gives you a great means to listen to your
transmitted signal, and record it if you want, in order
to get your own signal reports and make adjustments
based upon what you hear as opposed so someone else's
opinions. WebSDR is an internet based receiver technology and you can listen to receivers around the world by opening the WebSDR website: http://www.websdr.org/ The web page will look similar to the following image. 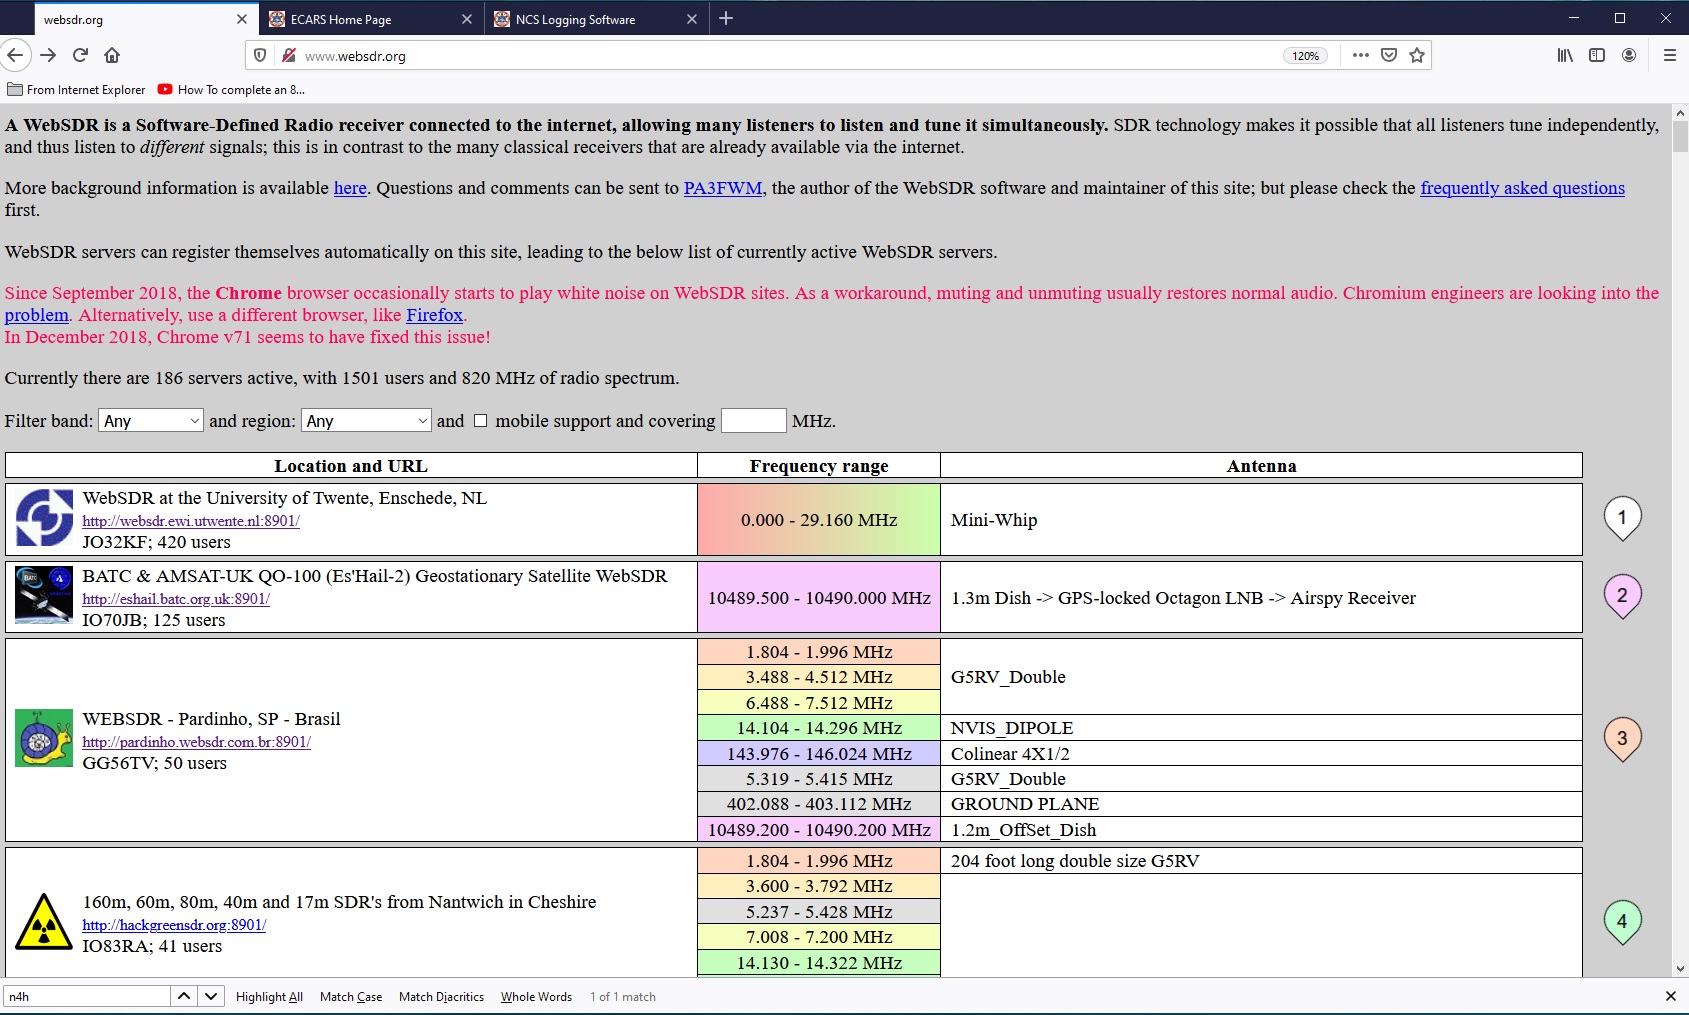 This is a listing of all the currently functional WebSDR stations around the world, 187 at the time of this writing. At the bottom of the grey band in the upper half of the web page, you will see data entry boxes to filter the listing to be more manageble and focused on a frequency band and/or geographical area of interest. For example, if you set the band filter to '40 meter' and the region filter to 'North America', you will see all thoses WebSDR stations in North America that have at least one receiver that covers all or part of the 40 mtr band, as shown in the following images. 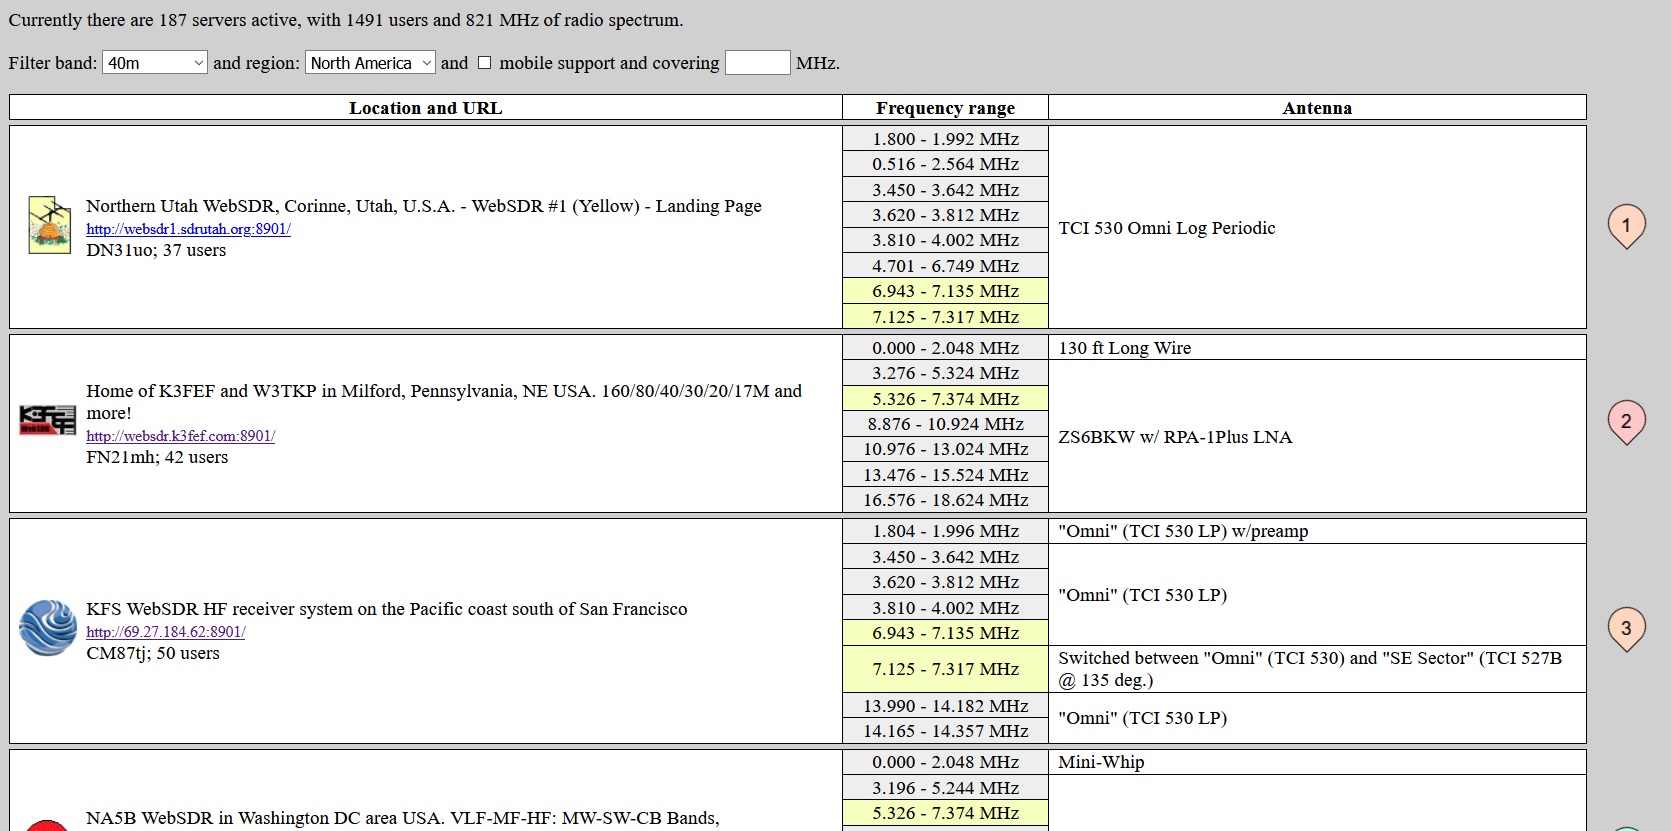 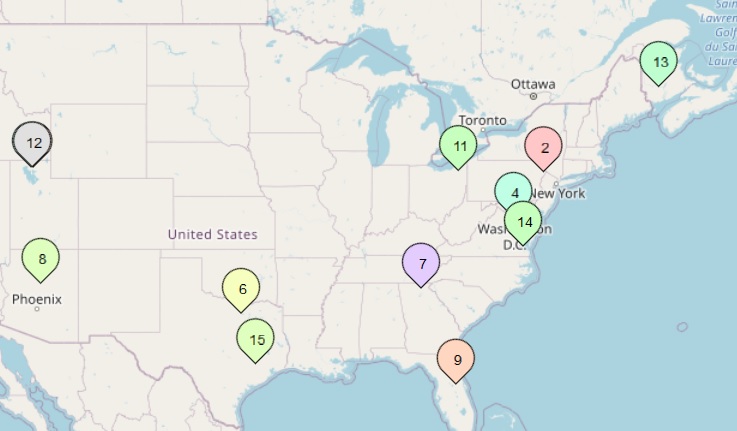 How to Listen To Your Transmitted Signal Look at the map and listing and determine a set of WebSDR stations that are the appropriate distance to support propagation between your transmitting QTH and the WebSDR QTH. Select them, one at a time, until you find a station that allows you to hear yourself on your computer audio output speakers when you transmit from your rig, after you have tuned the WebSDR stations as described in the following. To select a station, click on its listing or the bubble on the map that indicates its location. If you click the bubble, it will give you the listing for that station, which you should click. Selecting a station opens the WebSDR controls for that station, as shown in the following image. This image is the default station format. A good number of stations have tailored the format of the station so that it does NOT look like this but you will see in the tailored station the elements that you see here. 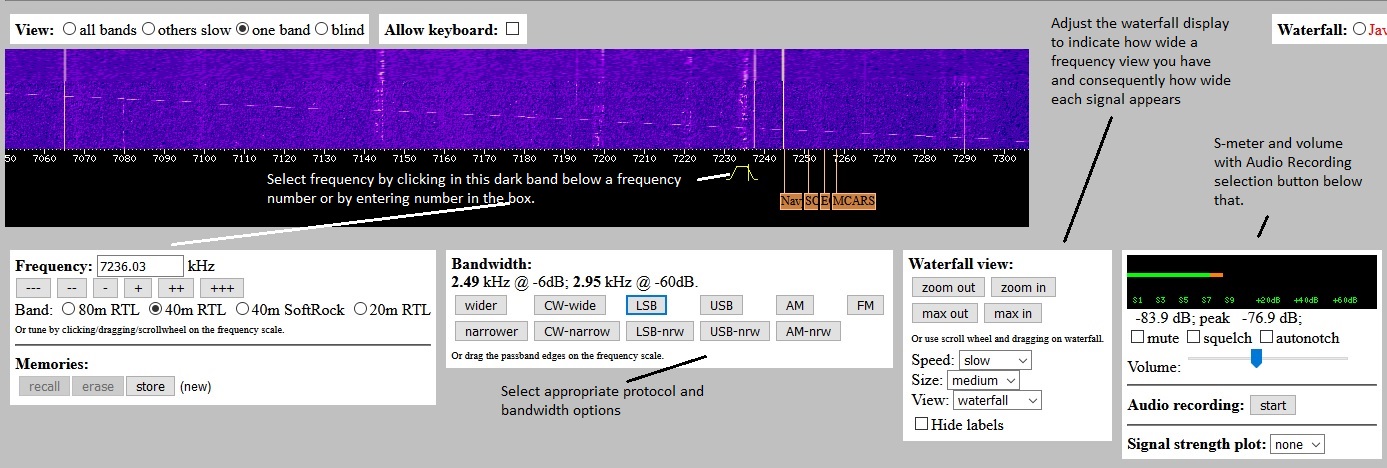 Tune the WebSDR receiver to the appropriate frequency by selecting the band and frequency, the modulation protocol and bandwidth, and set the width of the waterfall to suit your personal taste. With the mouse hovering in the black bar beneath the waterfall, the mousewheel will move the frequency up and down band. You can rough tune to a signal you see by left clicking in the black band below signal of interest (& below the band of frequency numbers), and then use the mousewheel to fine tune the frequency for best reception. Use the Volume slider to adjust to a comfortable listening level without directly changing your computer sound settings. You can mute the audio by clicking the little speaker icon on the windows tab for the webpage, or by clicking the mute checkbox, or by clicking your computer's sound icon. To restore sound you must 'undo' the muting action that you chose. With the WebSDR tuned to a section of the band that has no other signals in it, transmit from your rig and you should see your signal on the waterfall and hear your signal on your computer audio output. This can be very useful, but the speaker audio will have a short time response from the sound of your own voice and possibly your computer monitor function, so you will probably find it preferable to record the signal and play it back when you are not speaking into the microphone. How to Make A Recording of Your Transmitted Signal. To start recording, click the Audio recording button labeled 'Start' 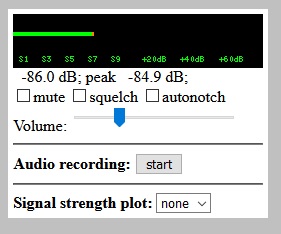 To stop recording, click the Audio recording button labeled 'Stop' [the label on the start button has changed to 'Stop'] 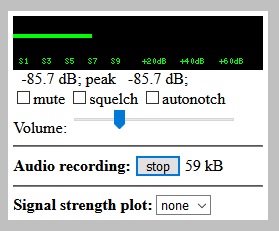 Download the recording by clicking the hyperlink labeled 'download'. Note that the warning in red ink is erroneous on my station and I've not figured out why it occuse. The downloaded file will be in the Download folder of your computer.  Listen to your recording, make whatever adjustments to your transceiver, and repeat as necessary until you like what you hear! |
|
Go To Top of Page |